As you may expect, much of the stock for Splott is based around steel traffic. Whether this is new sections, bulk ingots, coil and bar or scrap traffic, there is a whole host of wagon types that could be modelled. Here is a selection of some of the types constructed to date.
The more eagle-eyed of you may notice that the wagons are yet to be fitted with couplings. A the time of writing, it is my intention to utilise the Dingham autocoupler system. Future postings will describe the success or otherwise (watch this space).
SEAs and SPAs


The basis for the SPA and SEA wagons are the Cambrian kit. I have used Bill Bedford ‘w’ irons to provide compensation units. The wagons were spray painted with Halfords Carnival red car spray which is virtually Railfreight red and then they were weathered down using an airbrush, drybrushing and washes of oil paints.
The SEAs are also based upon the cambriam kit but I have drawn and 3D printed a skeleton which sits within the body over which I have glued a sheet of basting foil to act as the tarpaulin cover. Due to the nature of the foil, I used an etch primer to enable the paint to adhere to the foil surface.
Transfers for both wagon types were a combination of Appleby and Railtec.
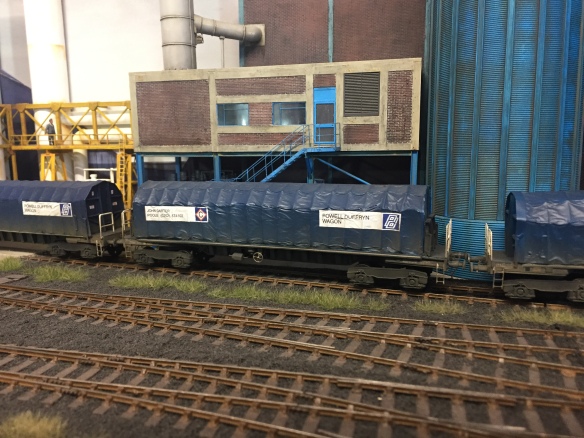
Powell Duffren – PXA
I originally constructed these wagons to run on Farkham but converted them to P4 to run on Splott.
They are constructed in a similar manner to the SEA above (except I made the skeleton out of plastic (not cheated by 3D printing!) with a foil overlay.
The replacement bogies are the excellent STENSON MODELS sprung bogies which come with clear instructions and are easy to put together.
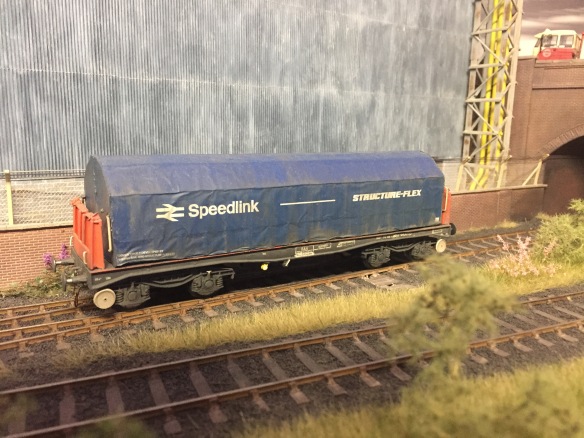
BAA – Structureflex
Whilst we are on the same topic, I also built a model of the Structureflex BAA which is essentially a BAA with a hood. I decided to use a Bachmann BAA as the basis for the model rather than the other BAAs (described later). This is a relatively simple wagon to do!
Vans
Some steel traffic was carried in vans or various descriptions. I have rewheeled 2 Bachmann VGA vans and weathered them using the technique of spraying the side and then wiping this back off (most of it anyway) with a thinners dampened cloth or brush. The first attempt was a bit of a leap of faith, but as with everything, its all about practice and gaining confidence. if you don’t try you wont get better!. That’s what I keep telling myself anyway.
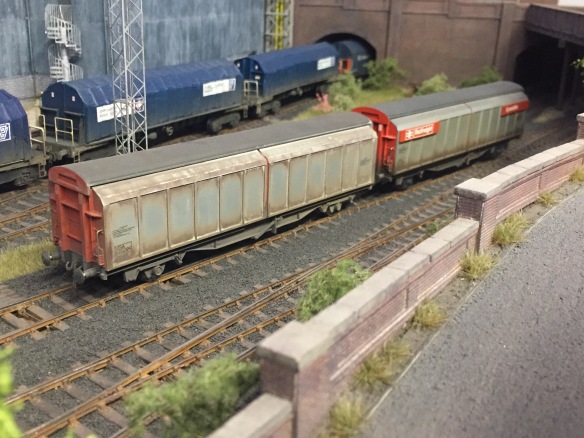
Picture of Bachmann VGAs
Other traffic was carried using standard 20″9′ wheelbase Vans such as VAA, VBA and VCAs. Bachmann (and Hornby (not used)) produce the VAA and VBA wagons and so some of these wagons were purchased. I wanted to do something different to these wagons so I thought about doing the VCA. This variant has the door handles on the centre two door panels (rather than the VAA/VBA on the large left door and the VDA with the handles on each of the 4 doors). I originally considered drawing an etch for the bodyside but realised that there is multiple levels of relief required on the side that would make etching difficult. I therefore decided to draw the sides in 3D.
A site visit to a preserved railway in East Anglia where a VCA is stored enabled me to get the dimensions required for the bodyside and allowed me to draw up the necessary artwork for printing.
Once the printer had worked its magic, I cut the sides of a VBA and inserted the new bodysides into place.
I decided to repaint the Bachmann wagons along with the two VCA wagons so that they would all look similar in tone. Hopefully they all look OK.


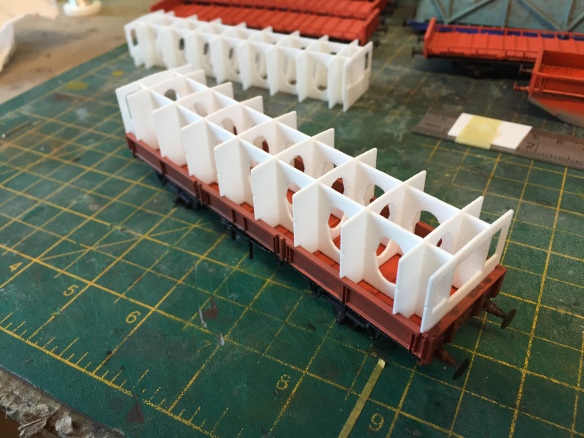
Bogie Steel Wagons (BAA)
Having built a rake of Cambrian BBA and BAA wagons for Farkham, I decided that I wanted to do something which was a bit more of a challenge for this layout so I decided to have a go at building my own BAAs with the intention of following up with some BBAs.
Using the Colin Craig drawings as a basis (taken from the DEMU Wiki page) and using some excellent reference photos from Huw Millingtons site showing the BCA variants, I decided to draw in 3D the basic body and underframe.


These were then printed in FUD (via Shapeways)
My attention could then turn to the body and ends. These were formed using etched brass and stainless steel components. The deck comprises of 37 ‘n’ shaped, perforated brass ribs which were bent to shape and soldered into slots in the brass base sheet. Inserted between the ribs and the base sheet was a thin sheet of perforated stainless steel mesh to form the open grid effect to the deck.
I have modelled 4 different end variations across the 11 wagons modelled, the fifth type being attached to the last batch of wagons which had a different body design which I havnt modelled (yet!). Again these were soldered up using brass etches (with at least 16 pieces per end for the simpliest variant).
The wagons were then fitted with Cambrian bogies before being painted with black primer and red ends. Transfers were provided by Railtec.
To complement the wagons I have built some of the fabulous Stenson Models coil cradles. These will add some necessary weight to the wagons.
Here are some picture of the variants from different angles.


Tank Wagons (TTA)
I have recently completed a rake of 7 TTA tank wagons. The base model is the Bachmann TTA which has been modified.
The first action was to remove the plastic moulded walkways and then filling in the holes body with filler. I have replaced the walkways with the excellent Stenson Models etched walkways. these are easy to assemble and the drilling template is a fantastic aid to make the fitting possible.
I have also altered the chassis by fitting the parabolic suspension and brake levers again supplied by Stenson Models.
The basic paint finish was provided with a coating of Tamiya Light grey primer spray. This was then followed by spraying using gunmetal and blue colours. Once this had started to dry, I then dry brushed this away using white spirit to try and create the weathered effect. This is the first time I have tried to weather a tank, so it was with a deep breath that I pointed and squirted the paint at these wagons. I am quite pleased with the results though (beauty is in the eye of the beholder!).


I will update the post with some more images of some of the other vehicles when I next get chance.
